Integrate PlayFab in Unity
Learn how to integrate PlayFab backend and Openfort with your game
Overview#
PlayFab is a backend service provided by Microsoft for game developers, offering tools for live game management, all powered by Azure's cloud infrastructure.
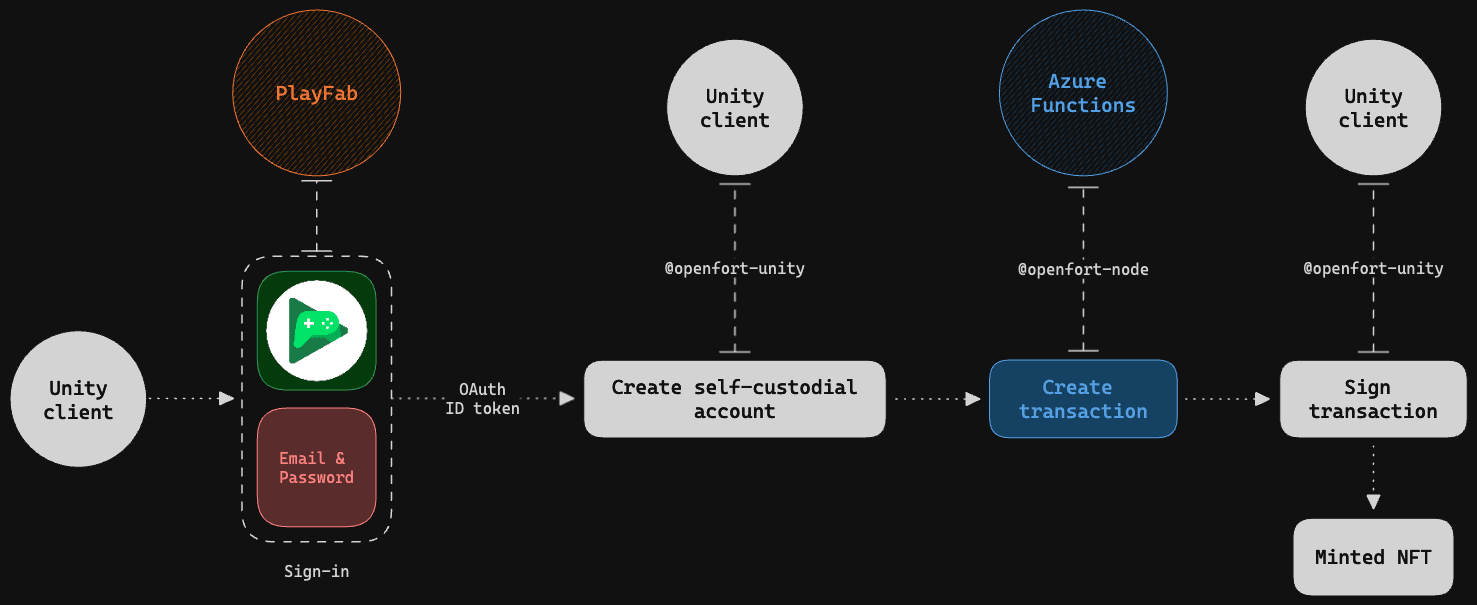
In this integration, we use the Google Play Games plugin for Unity to handle authentication with PlayFab, ensuring a seamless and secure login experience for users on Android devices.
Once authenticaded we use PlayFab's user identity token to create a self-custodial account using Embedded Smart Accounts.
Moreover, by integrating the Openfort SDK into Azure Functions, we establish a seamless connection to PlayFab. Unity clients using the PlayFab Unity SDK can tap into these functions, accessing the full range of Openfort features within the game environment.
Application Workflow#
Prerequisites#
- Create a PlayFab account and title
- Set up your Azure development environment:
- Sign in to dashboard.openfort.xyz and create a new project
- Download or clone the sample project:
- Open unity-client with Unity
- Open azure-backend with VS Code
- Watch the video tutorial on configuring Google Play Games for Unity and apply it to unity-client. Note that:
- You need a Google Play Developer account
- You need a Google Cloud project
- Google Play Games SDK is already imported to unity-client
- Skip the instructions related to Unity Gaming Services
- We provide a Keystore (password:
android). You can use it instead of creating a new one - Skip the step to create this script
Set up Openfort#
-
Add PlayFab as a provider
Add your PlayFab title and choose Save:

-
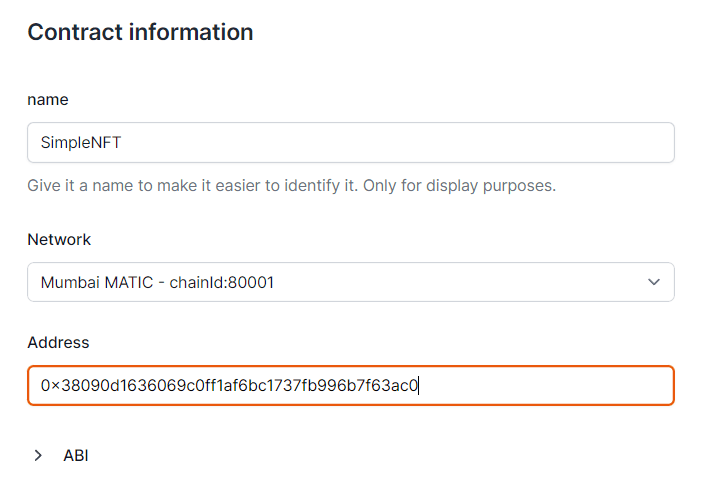
Add a Contract
This sample requires a contract to run. We use 0x38090d1636069c0ff1Af6bc1737Fb996B7f63AC0 (NFT contract deployed in 80001 Mumbai). You can use this for the guide:
-
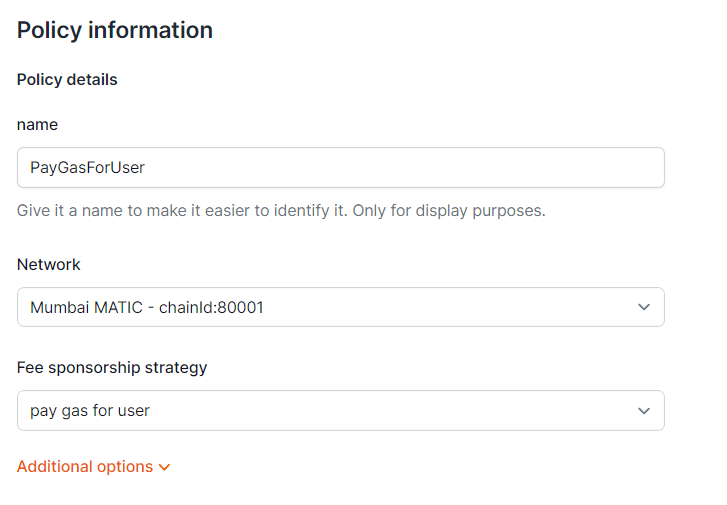
Add a Policy
We aim to cover gas fees for users. Set a new gas policy:
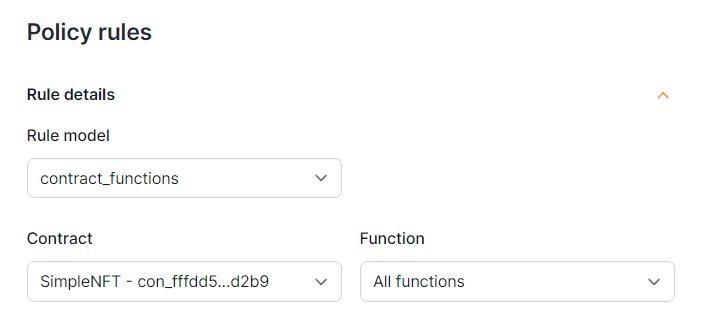
Now, add a rule so our contract uses this policy:
Deploy Azure Backend#
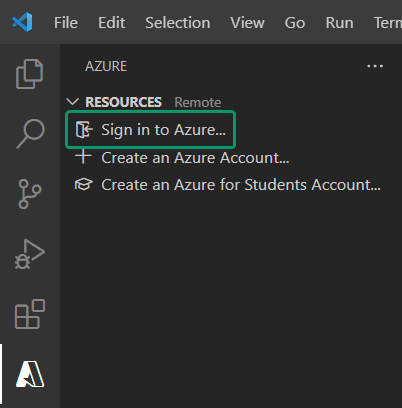
Open azure-backend with VS Code and sign in to Azure:
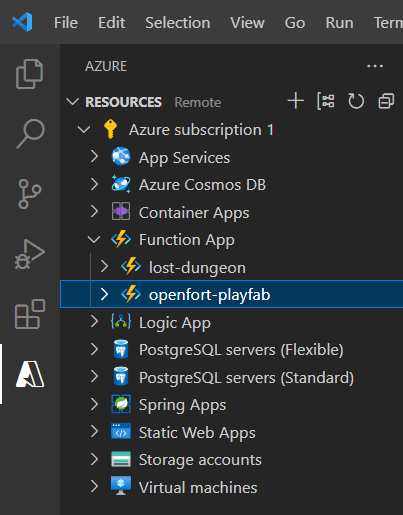
Ensure your Function App (here, it's "openfort-playfab") is listed:
In the terminal, run:
_10npm install
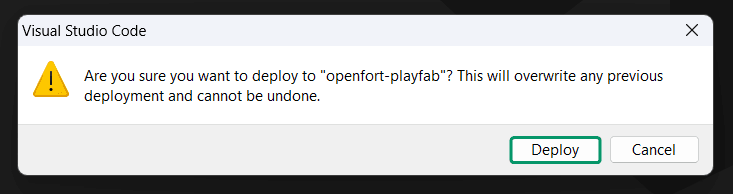
In the explorer, right-click on a function and select Deploy to Function App:

Next, choose your Function App:

Then, click on Deploy:
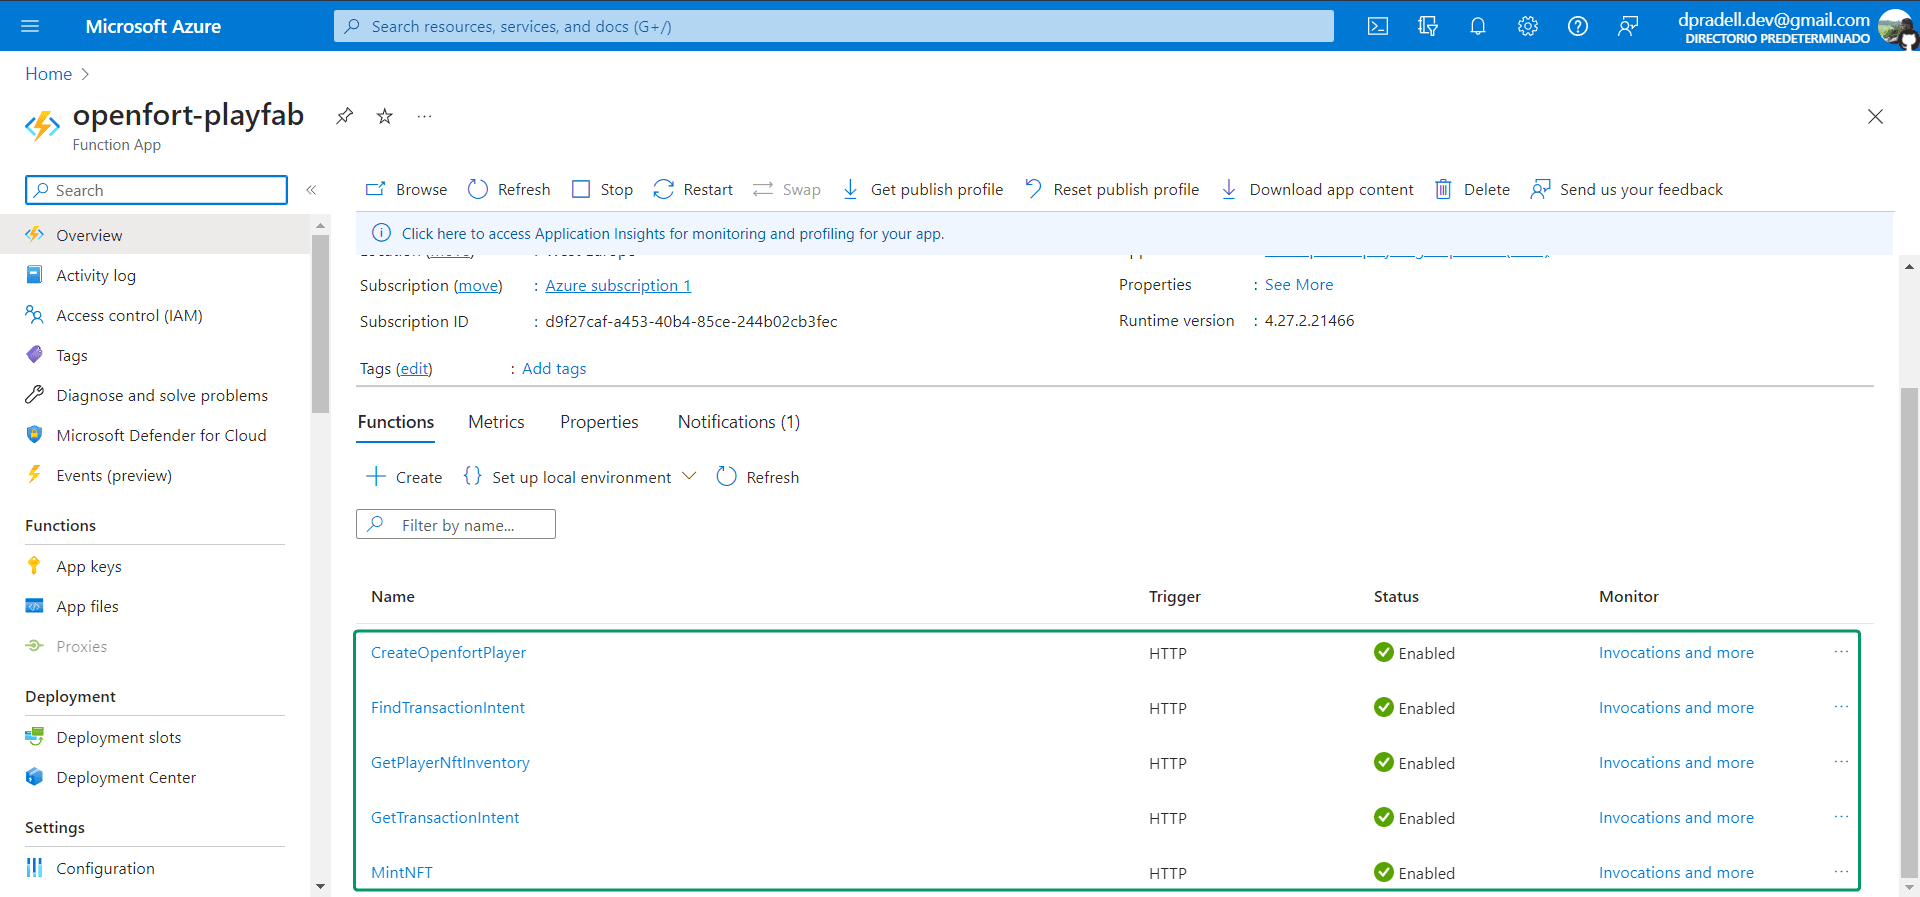
Navigate to your Azure Portal and open your Function App. You should see all the functions listed:
Click on any function and select Get Function Url:
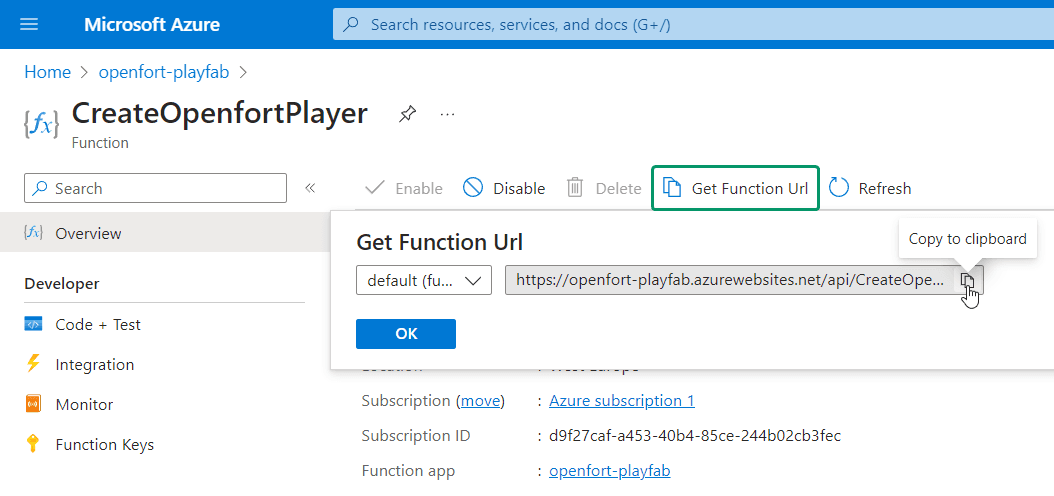
Subsequently, add this URL (along with all others) to PlayFab to enable access to our Azure Functions from within PlayFab.
Set up PlayFab Title#
-
Register Azure Functions
Visit the PlayFab developer dashboard, choose your title, and click on Automation:
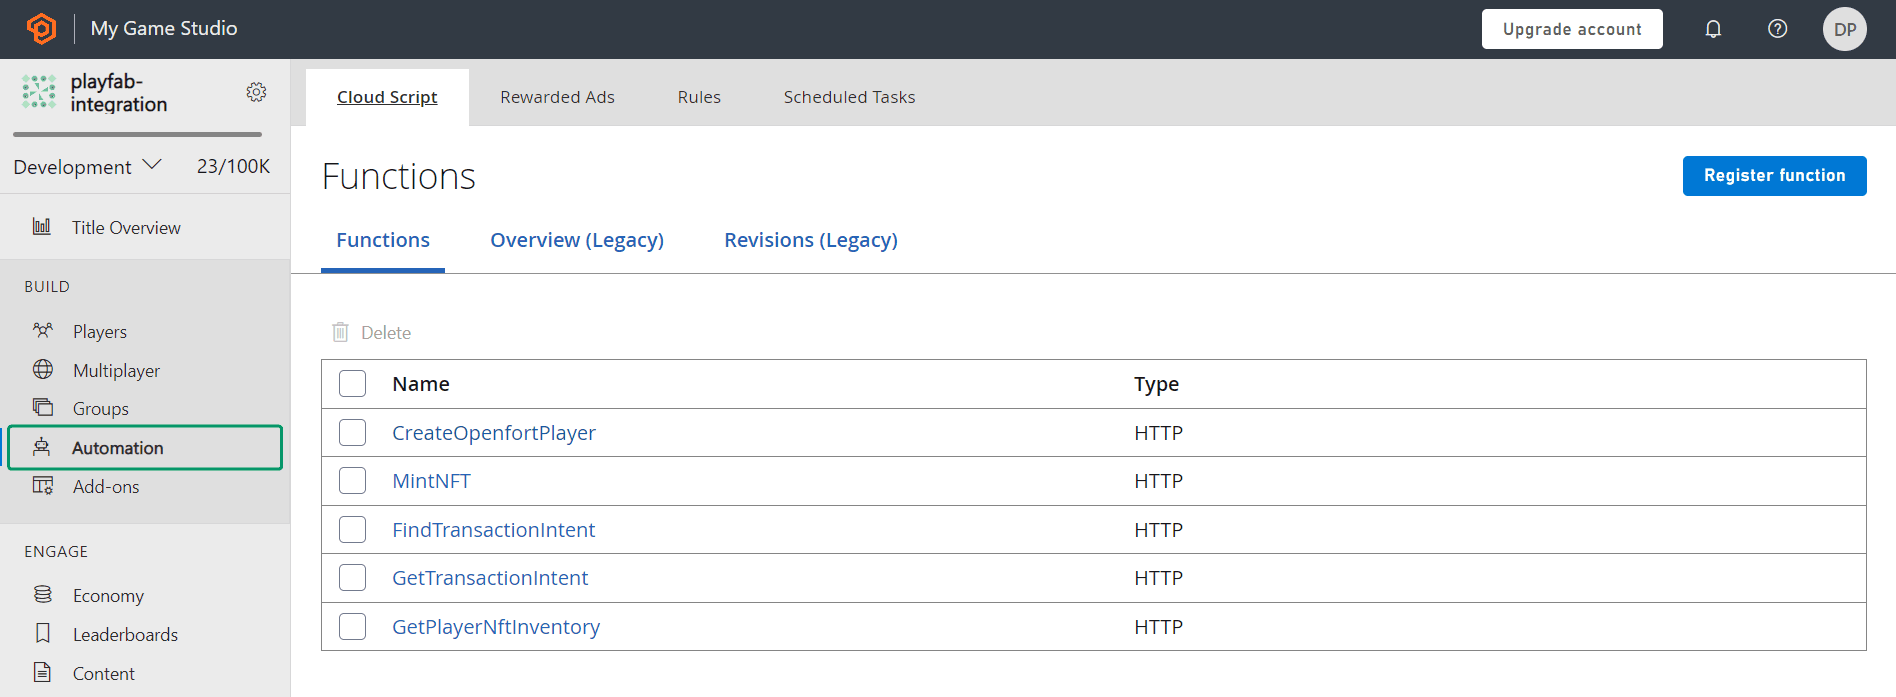
Our functions are already registered. To do the same, click Register function and provide the function name along with its URL:
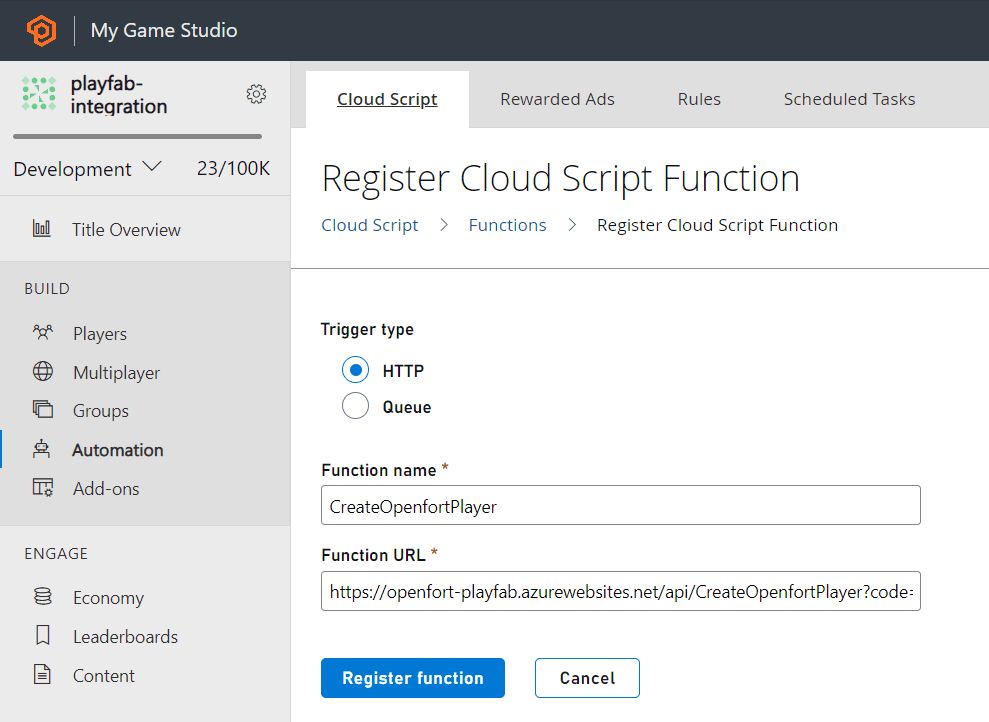
Repeat this for all deployed functions.
-
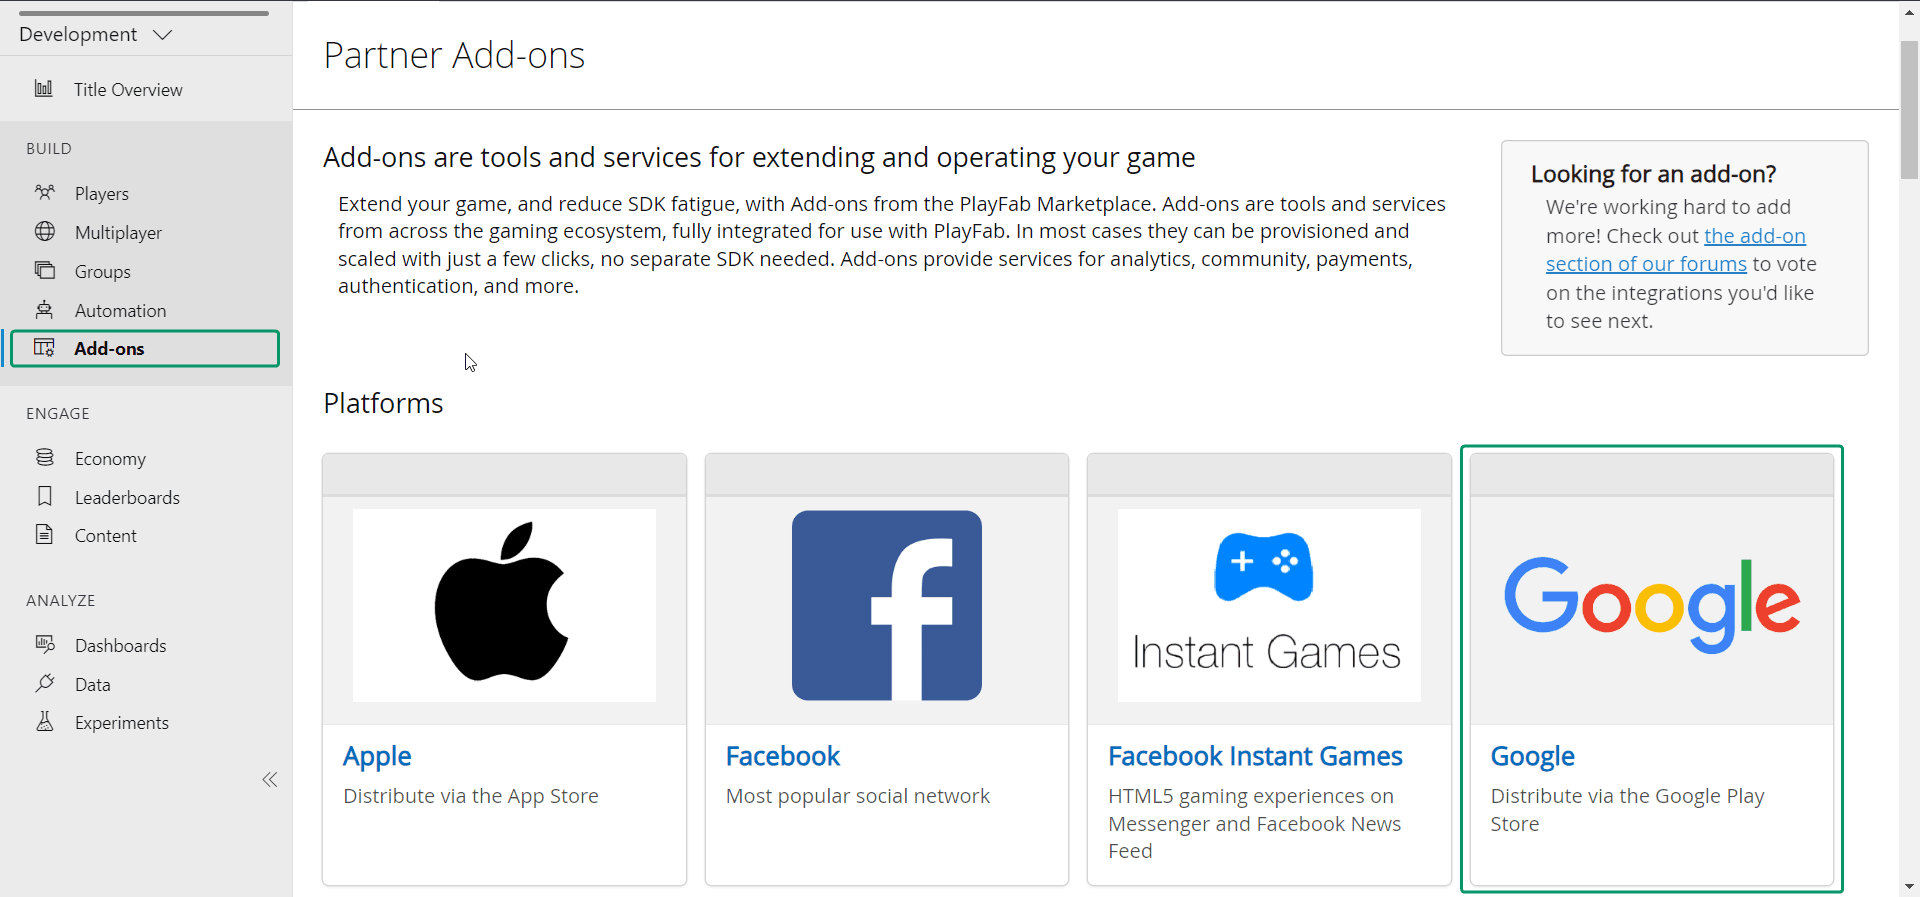
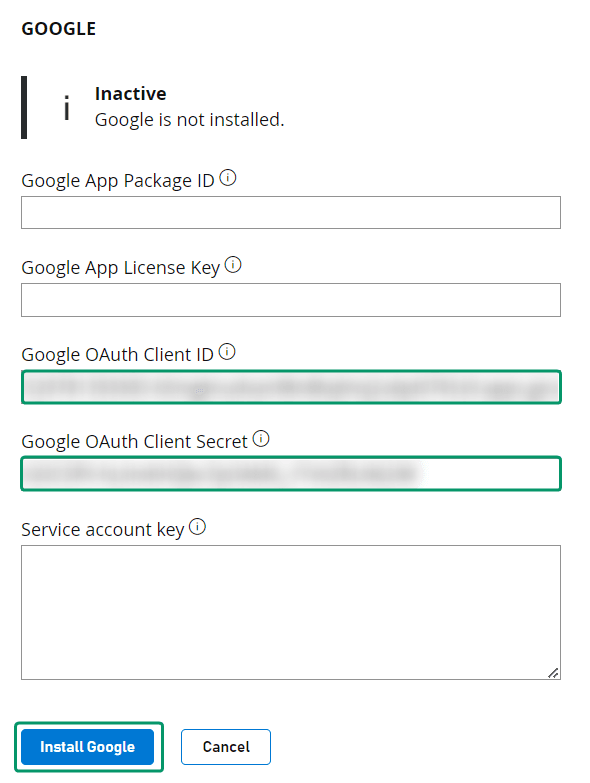
Install Google Add-on
Navigate to Add-ons and choose Google:
Then, visit the Google Cloud APIs Credentials dashboard and click on the arrow icon next to your OAuth Web Application Client:

Copy both the Client ID and Client Secret:
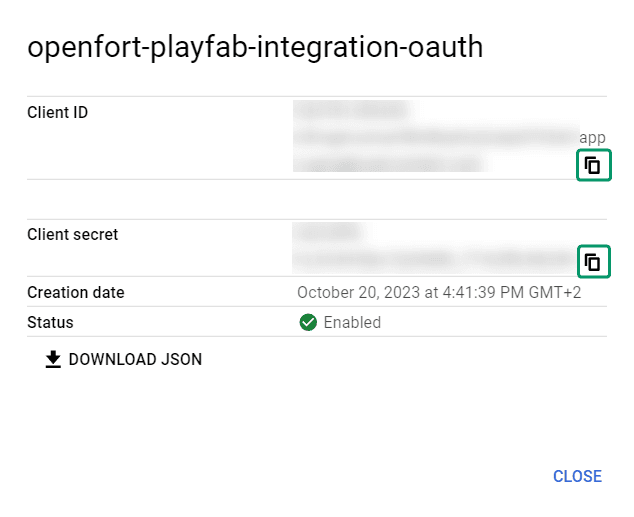
Return to the PlayFab dashboard, paste these details into the Google OAuth Client ID and Google OAuth Client Secret fields, and click Install Google:
-
Add PlayFab OAuth Redirect URL
For this, go to the Google Cloud APIs Credentials dashboard. Here, select your Web application:

In the Authorized redirect URIs section, add the URL below and click Save:
_10https://oauth.playfab.com/oauth2/google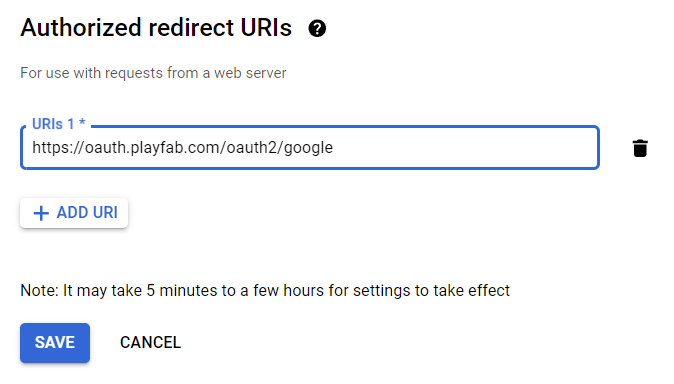
Set up Azure Backend#
Our Azure backend requires environment variables from both PlayFab and Openfort. Let's configure them.
-
Add Openfort Environment Variables
-
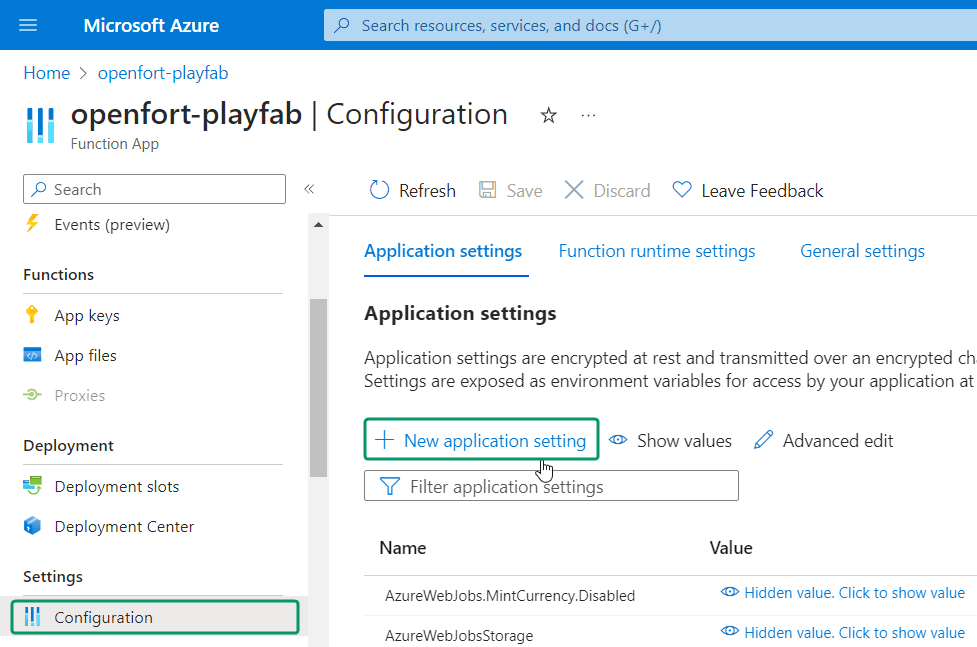
Navigate to the Azure Portal and select your Function App.
-
Under Configuration, click New application setting:
-
Provide the following details:
- Name:
OF_API_KEY - Value: Retrieve the Secret key
- Name:
-
Add another application setting:
- Name:
OF_NFT_CONTRACT - Value: Retrieve the Contract API ID
- Name:
-
And another:
- Name:
OF_SPONSOR_POLICY - Value: Retrieve the Policy API ID
- Name:
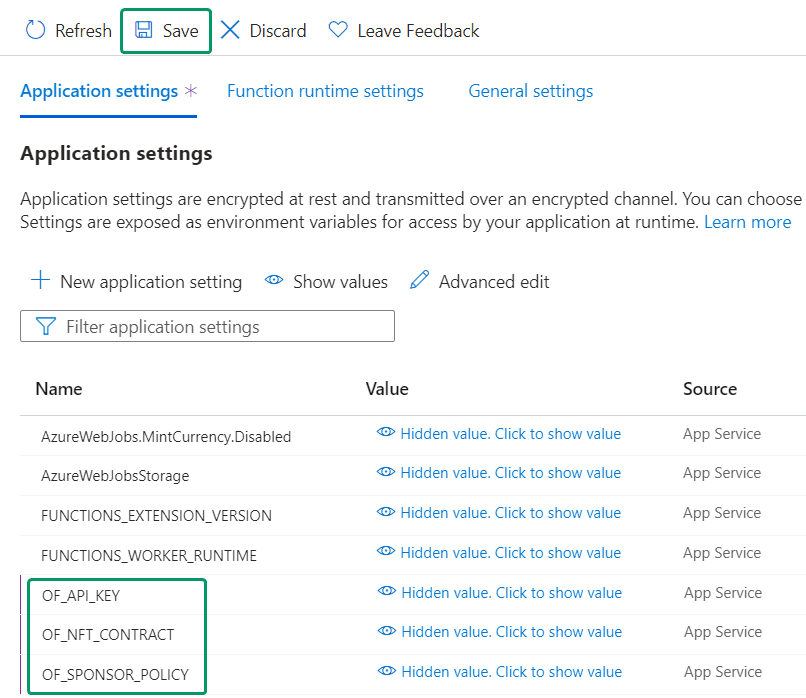
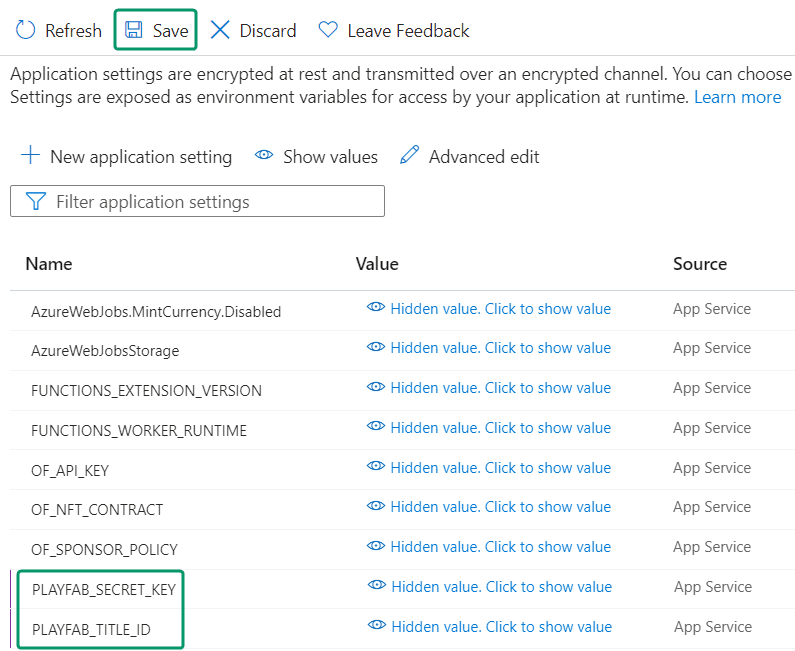
After adding these, your configuration panel should resemble the following. Click Save:
-
-
Add PlayFab Environment Variables
-
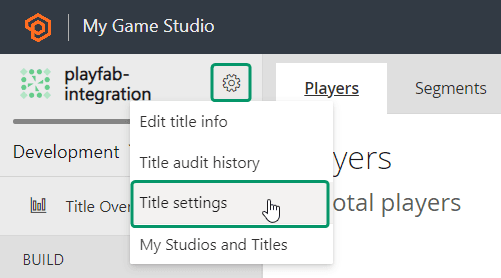
Visit the PlayFab developer dashboard, select your title, and navigate to Settings wheel --> Title settings:
-
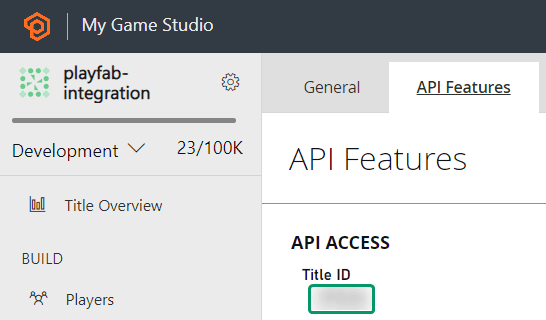
In the API Features section, copy your Title ID:
-
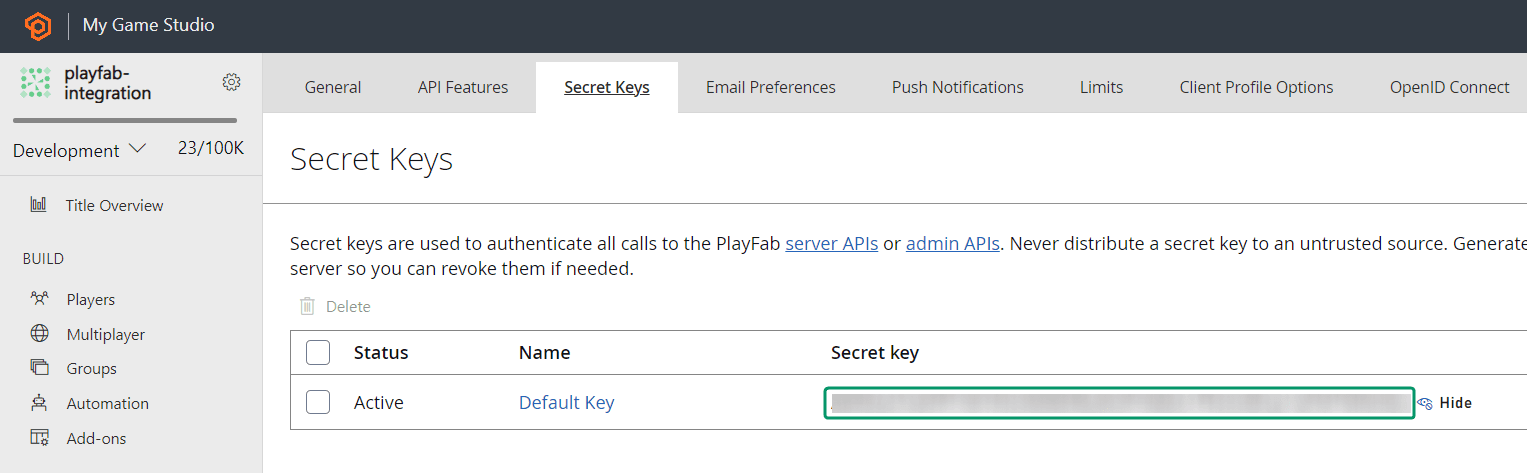
Under Secret Keys, note down your Secret key:
-
Return to the Azure Portal and choose your Function App.
-
Under Configuration, select New application setting and input:
- Name:
PLAYFAB_TITLE_ID - Value: [Your Title ID]
- Name:
-
Add another application setting:
- Name:
PLAYFAB_SECRET_KEY - Value: [Your Secret Key]
- Name:
Your configuration panel should now look like the following. Confirm your changes by clicking Save:
-
Set up Unity Client#
This Unity sample project is already equipped with:
To begin, open unity-client with Unity:
-
Configure PlayFab SDK
- Navigate to the Project tab.
- Search for
PlayFabSharedSettingsand input your PlayFab Title ID:

-
Configure Google Play Games SDK
-
Even if you've set up the Google Play Games SDK following the required tutorial, ensure that you've correctly configured all fields by navigating to Window --> Google Play Games --> Setup --> Android setup:
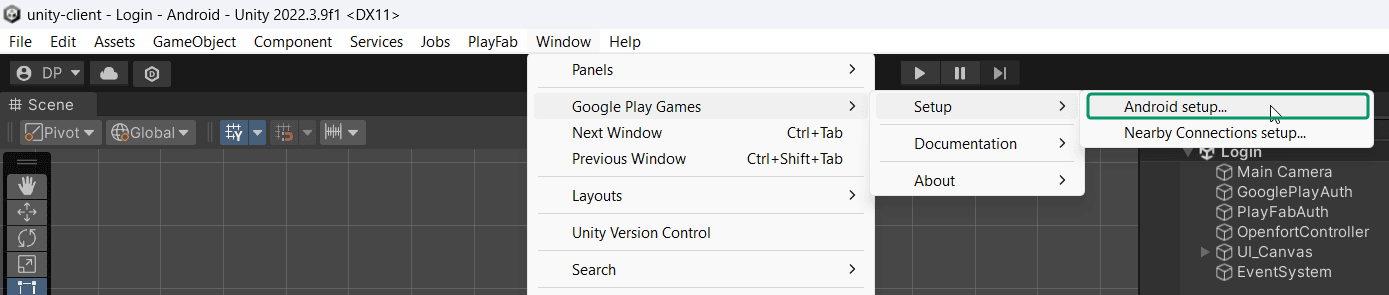
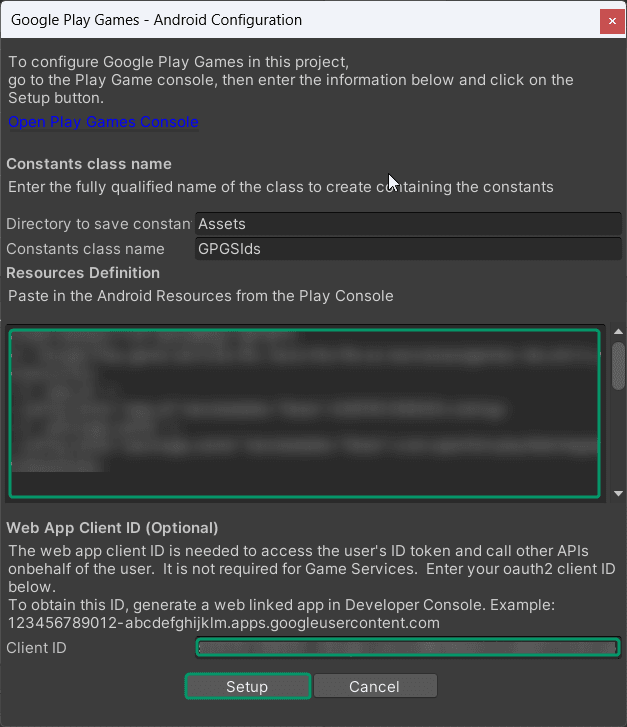
By doing this, when the game runs on Android, it will utilize Google Play Games for user authentication via PlayFab. Otherwise, the default PlayFab authentication will be used.
-
Test in Editor#
Play Login scene, opt for Register, provide an email and password, then click Register again. This scene should appear:
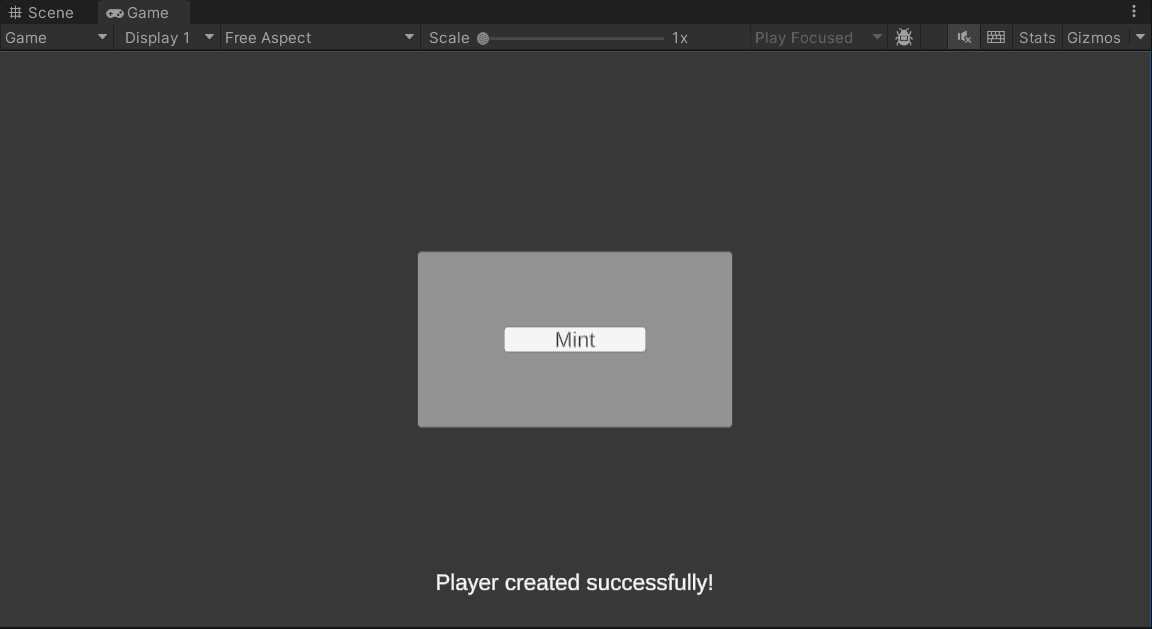
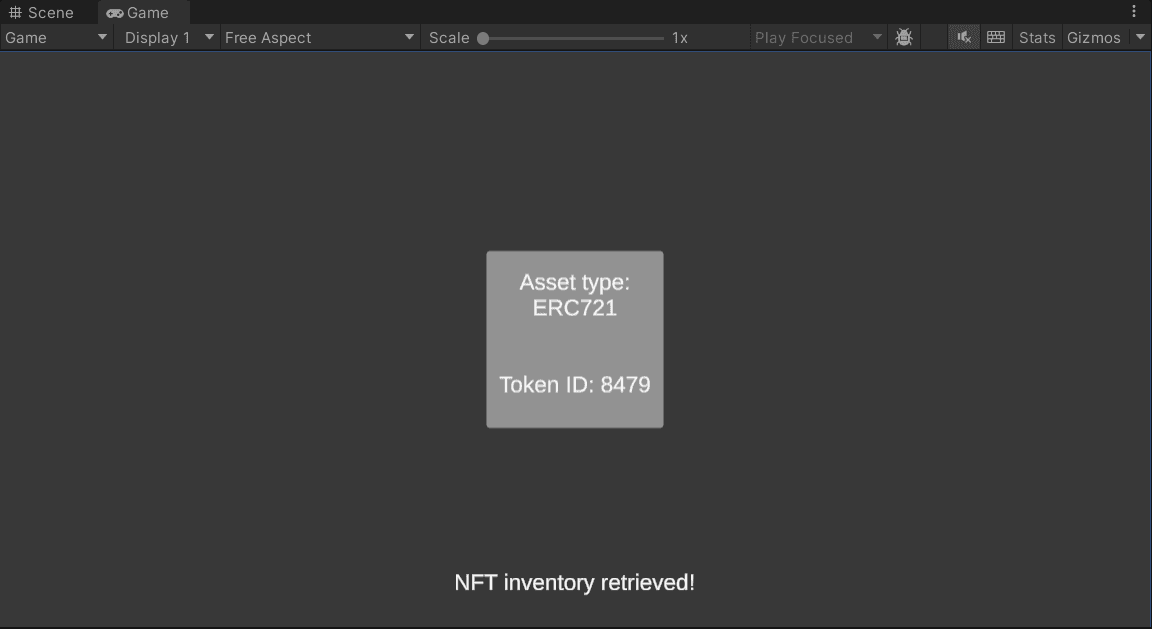
Select Mint. After a brief period, you should see a representation of your newly minted NFT:
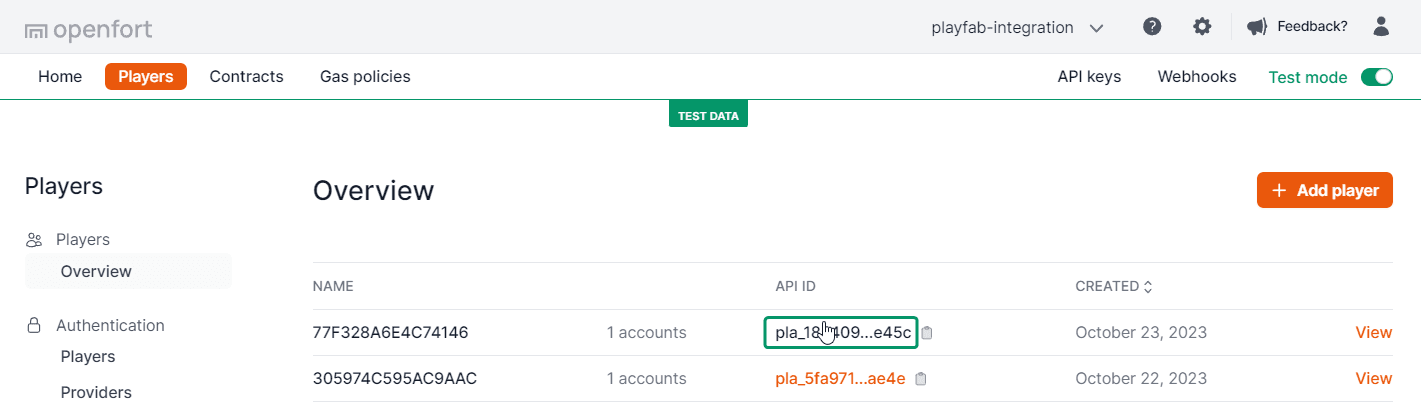
In the Openfort Players dashboard, a new player entry should be visible. On selecting this player:
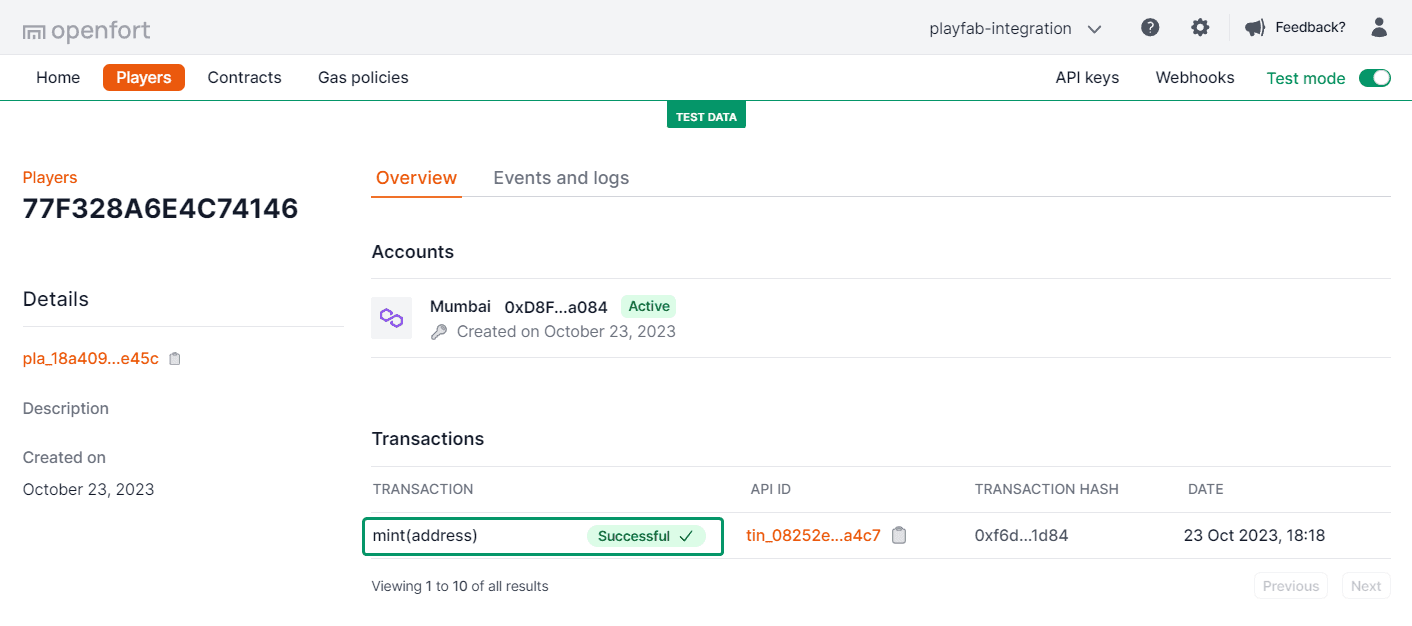
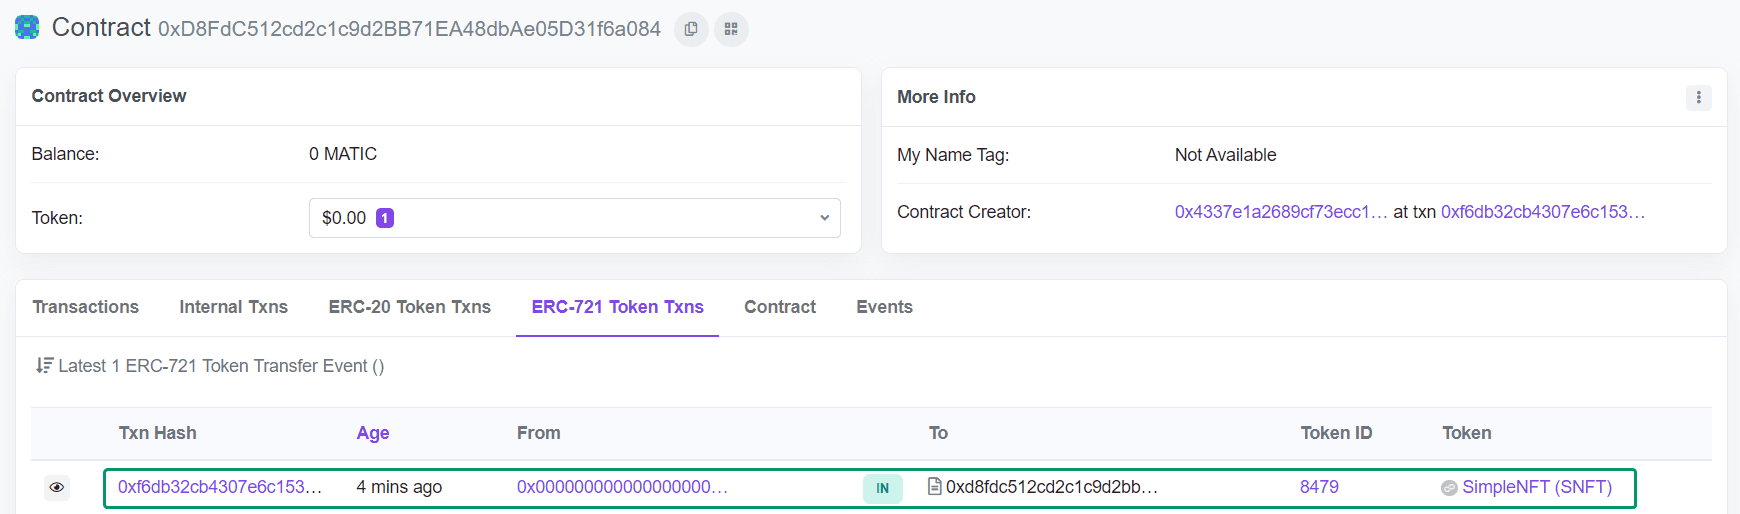
You'll notice that a mint transaction has been successfully processed:
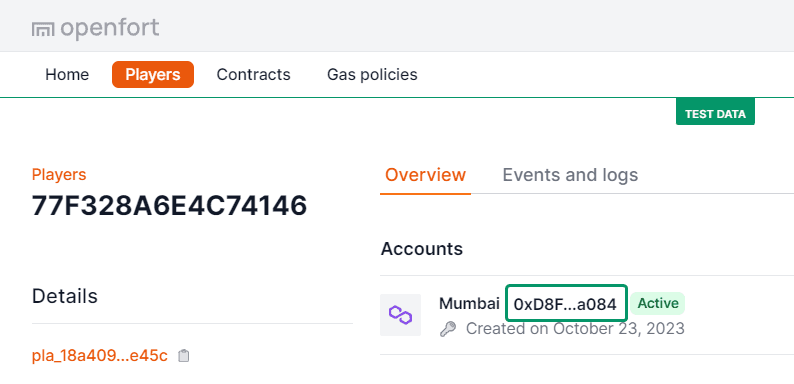
Additionally, by choosing your Mumbai Account and viewing ERC-721 Token Txns, the transaction is further confirmed:
Test on Android#
Upon building and running the game on an Android device, the registration/login process is automated via Google Play Games, resulting in a streamlined user experience.
Extra: Guest Registration Functionality#
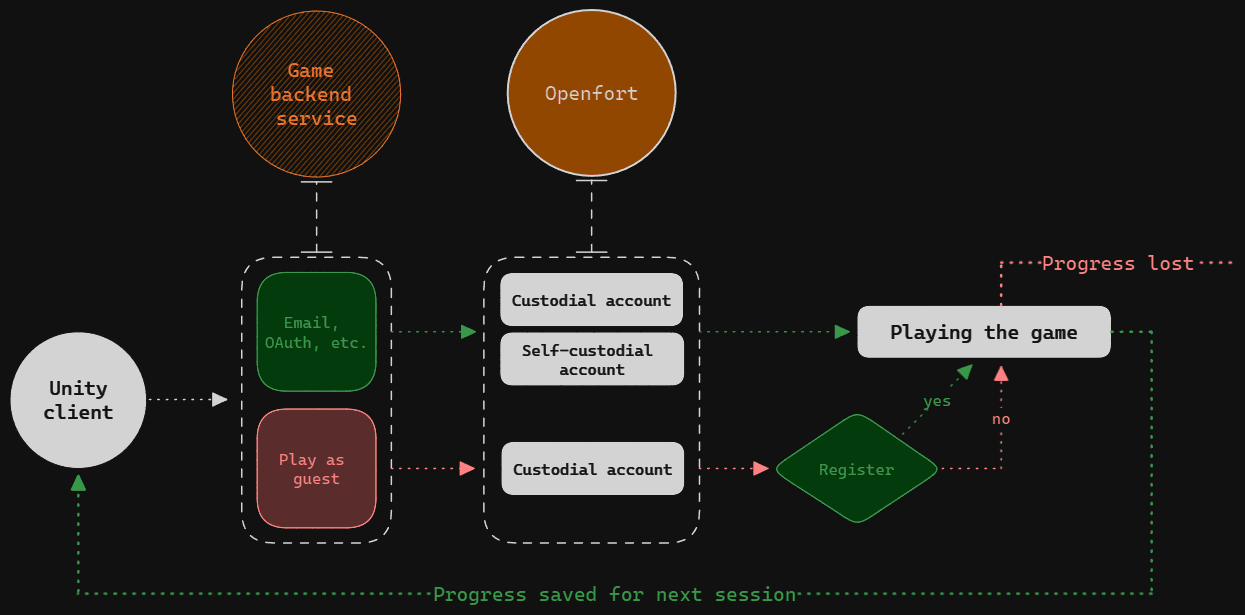
Playing as a guest is a common way for players to authenticate to games, and all BaaS providers offer that functionality. The problem is that if the player has made some progress while playing as a guest, they will lose it for the next gaming session.
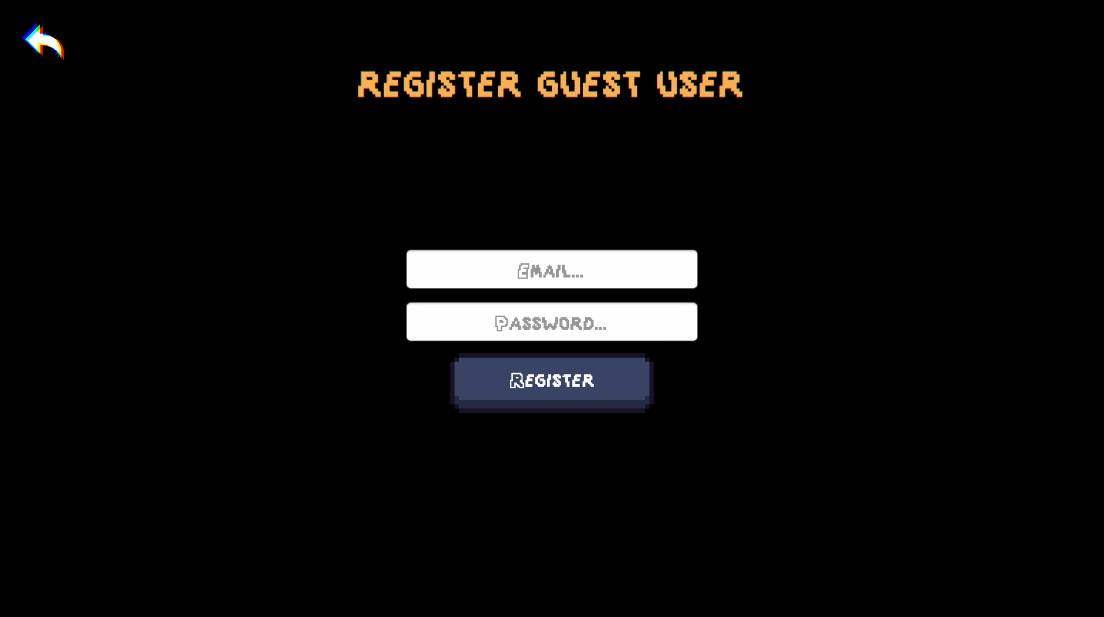
For this reason, we have introduced Guest registration functionality in Lost Dungeon, allowing players to authenticate as guests and register with an email and password at their convenience:
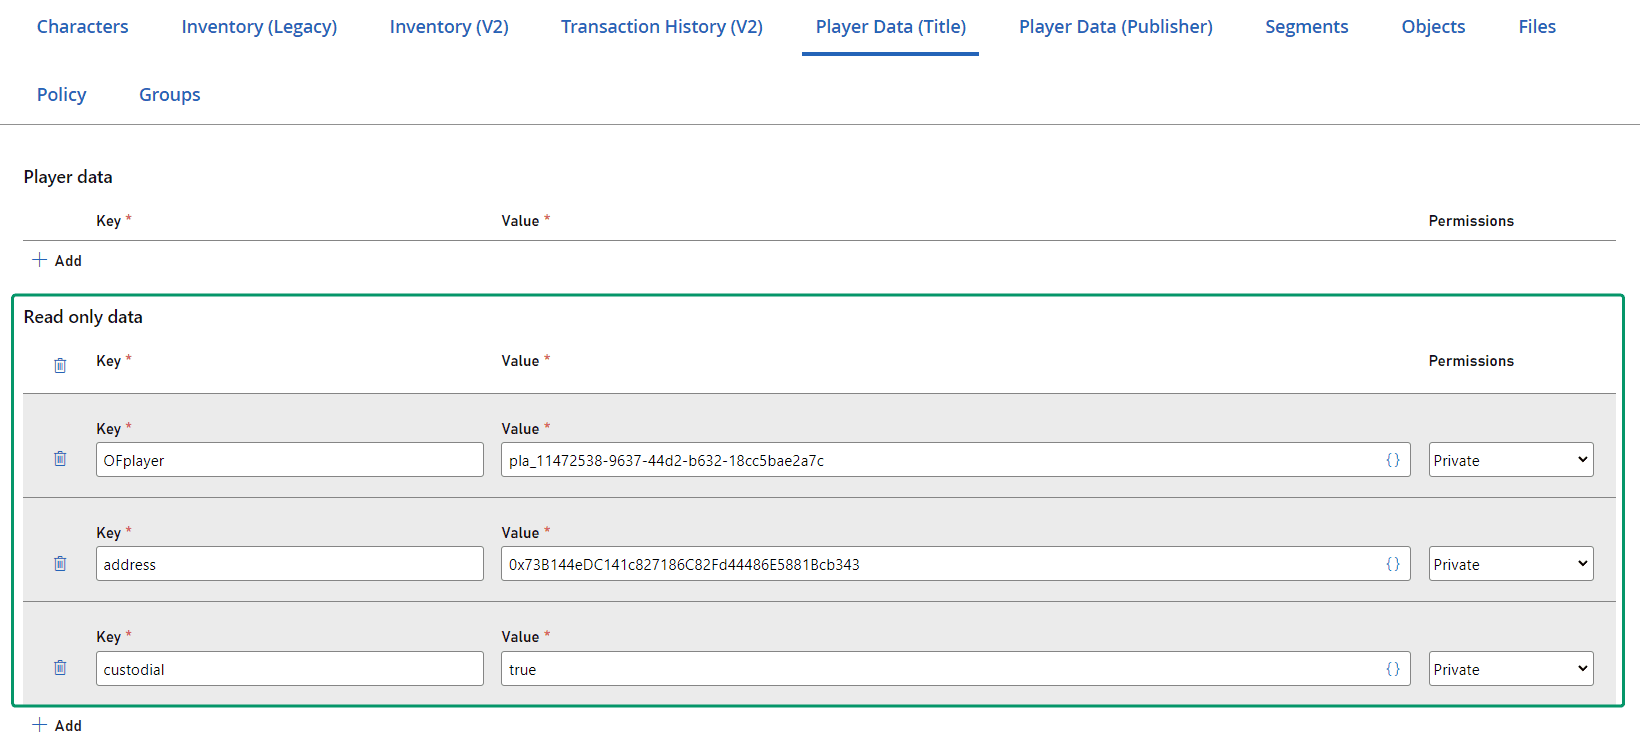
When that happens, a new user is created in the BaaS (PlayFab in this case), and the Openfort player information associated with the guest user is transferred to the new user:
This way, for the next session, the player can log in as the newly registered user and retain all the progress made while being a guest. Furthermore, they will now be able to enable self-custody and transfer all the progress (acquired blockchain assets) to a self-custodial account of their choice.
Conclusion#
Upon completing the above steps, your Unity game will be fully integrated with Openfort and PlayFab. Always remember to test every feature before deploying to guarantee a flawless player experience.
Get support#
If you found a bug or want to suggest a new [feature/use case/sample], please file an issue.
If you have questions, comments, or need help with code, we're here to help:
- on Twitter at https://twitter.com/openfortxyz
- on Discord: https://discord.com/invite/t7x7hwkJF4
- by email: support+youtube@openfort.xyz