Custom OIDC compatible Auth
Learn how to setup your custom OIDC compatible auth
OIDC authentication setup is a viable choice when leveraging an external authentication provider such as Auth0, Cognito, etc., that offers JWK publication for token authenticity verification.
An OIDC authentication framework employs a public-private key pair, utilizing the private key to sign authentication tokens. The public key is made accessible via a public URL in JWKS format, typically found at https://{domain}.com/.well-known/jwks.json. When a user logs in, an idToken, a JWT, is produced and signed with the private key, following OIDC specifications for token field requirements. This JWT is then used within the embedded signer to create a user wallet.
The verification of the JWT against the public key confirms its authenticity, allowing wallet generation based on the subject (user identifier) within the idToken.
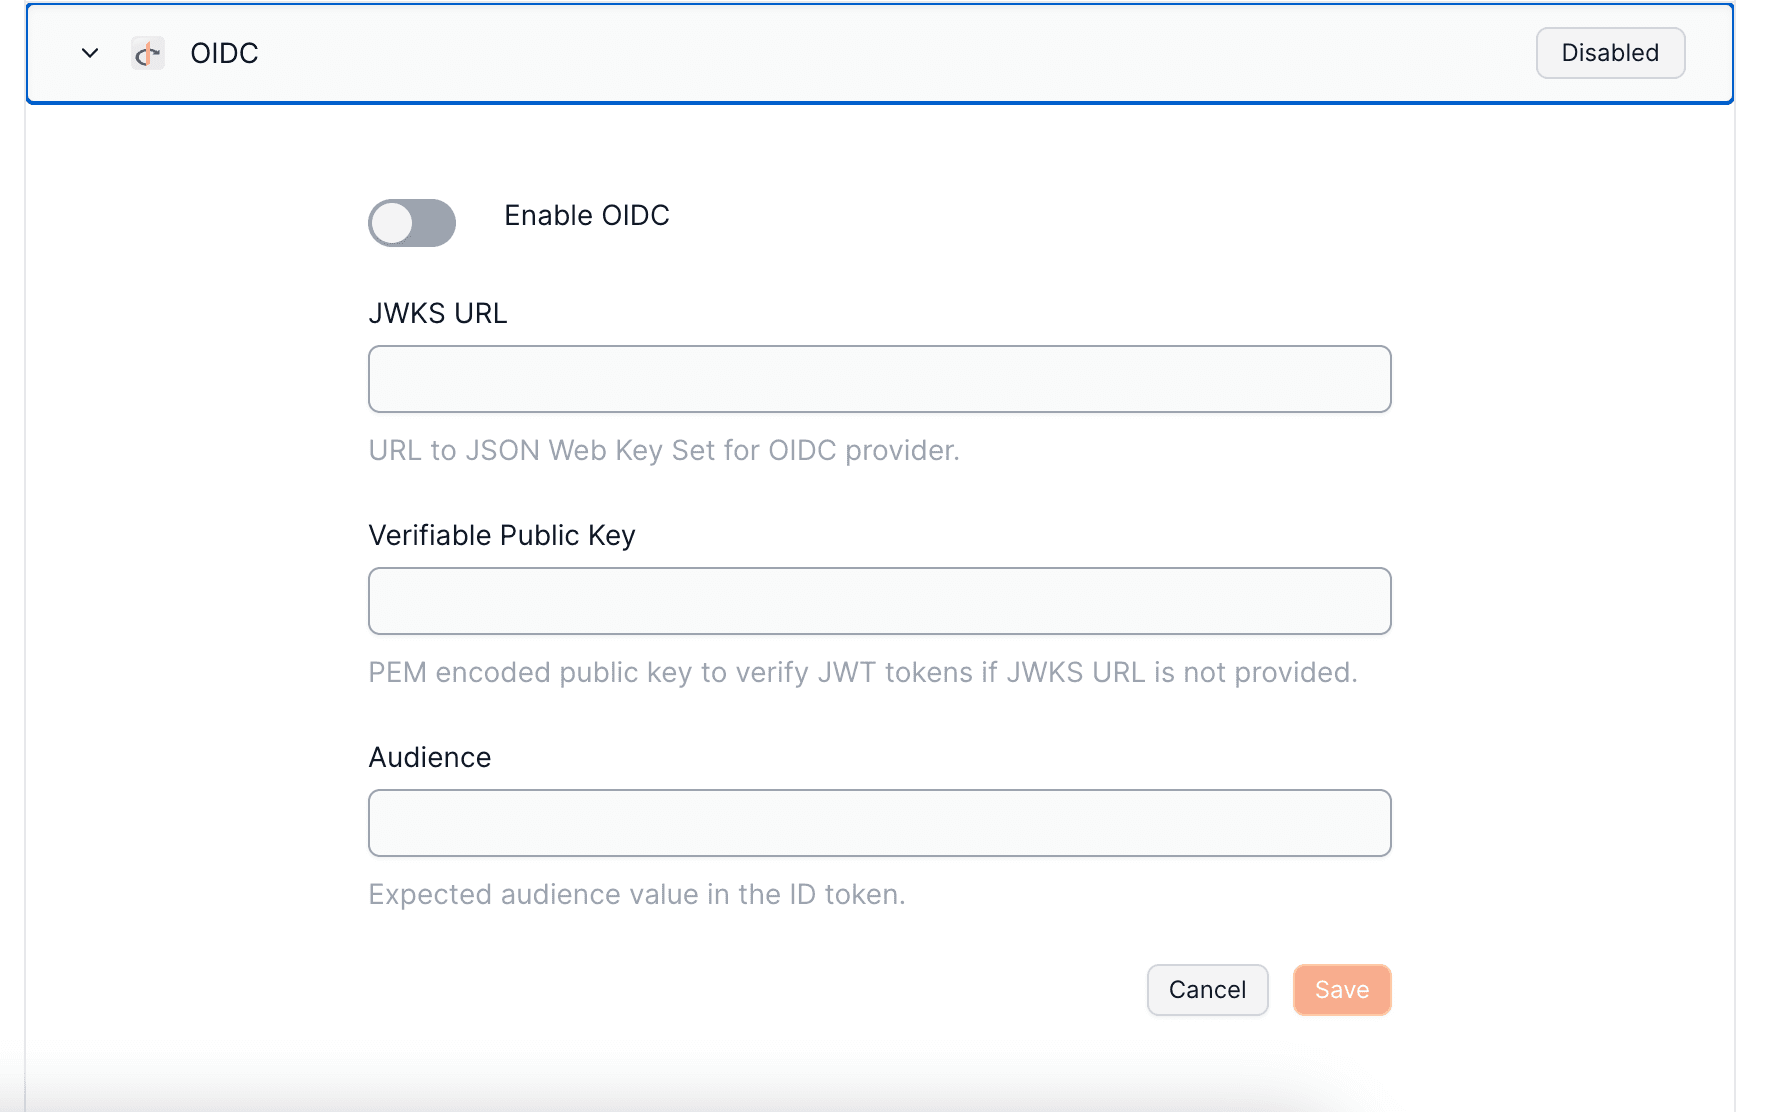
Input Requirements:
- JWKS File URL (public key): Validates the token's authentic signature.
- idToken's
audvalue: Confirms that the intended recipient of the token is correct.
Authenticating Users with OIDC-Compatible Authentication#
Set up your provider#
To set up your OIDC Authentication with Openfort, visit your dashboard provider settings.
Prepare your s#
Client-side Integration#
_10import Openfort from "@openfort/openfort-js";_10const openfort = new Openfort({_10 baseConfiguration: {_10 publishableKey: OPENFORT_PUBLISHABLE_KEY_10 }_10});_10_10 function loginWithOIDC() {_10 const token = await openfort.authenticateWithThirdPartyProvider({provider: ThirdPartyOAuthProvider.OIDC, token:idToken, tokenType:TokenType.ID_TOKEN});_10 }
Uppon successful authentication, the SDK will return: